


July has been a month of power-packed updates at TeamTrace… all designed to help you manage people, projects, and expenses with more clarity, control, and speed. From smarter expense tracking to effortless project workflows, and from field automation to task visibility like never before — every feature we’ve rolled out is here to make your workday smoother and your team more productive.
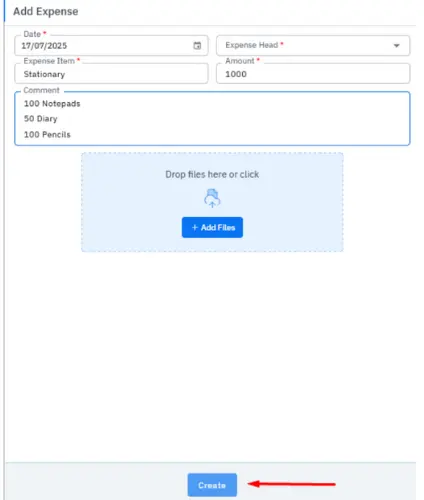
You can now easily track and manage both company and individual expenses in TeamTrace.
Note: Reports are view-only; editing or exporting is not available from this section.
Easily manage travel allowances for your field staff with automatic expense generation from Field People Logs.
How It Works:
Perfect for field teams — no more manual travel expense calculations.
Managing travel expenses for your field team just got simpler! Here’s how you can quickly set up and customize travel allowances within your account:
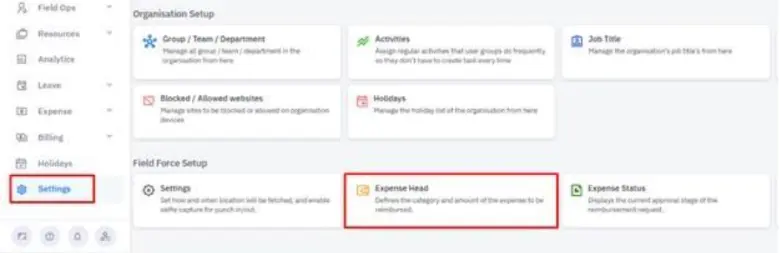
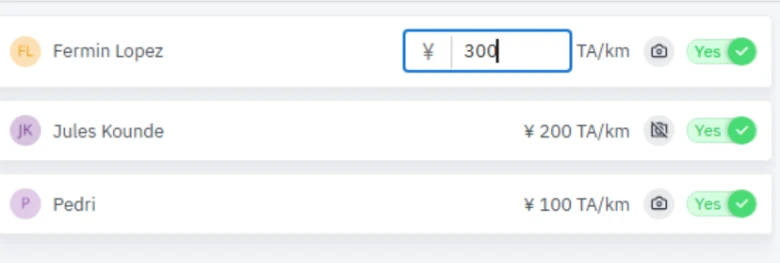
Head to Settings > Field Force Setup > Enable Field Tracking. You’ll see a list of all field employees along with their respective travel allowance rates.
2. Edit Travel Allowance per Kilometer
Each employee’s allowance rate (e.g., 300 Yen per km) is displayed next to their name. Want to adjust it? Just click on the figure and update it instantly.
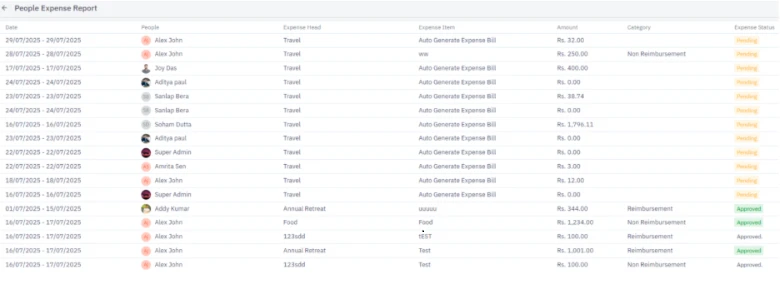
We’ve made tracking your company and employee expenses easier than ever!
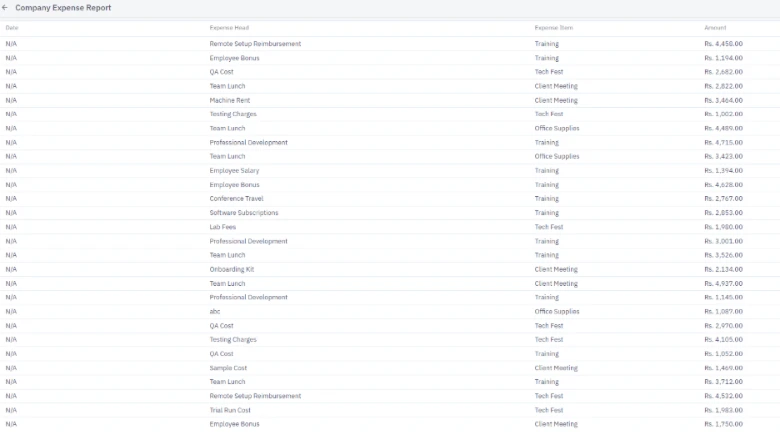
Quickly view and analyze company-wide expenses by date, expense head, and expense item. Instantly track spending on travel, office items, and more.
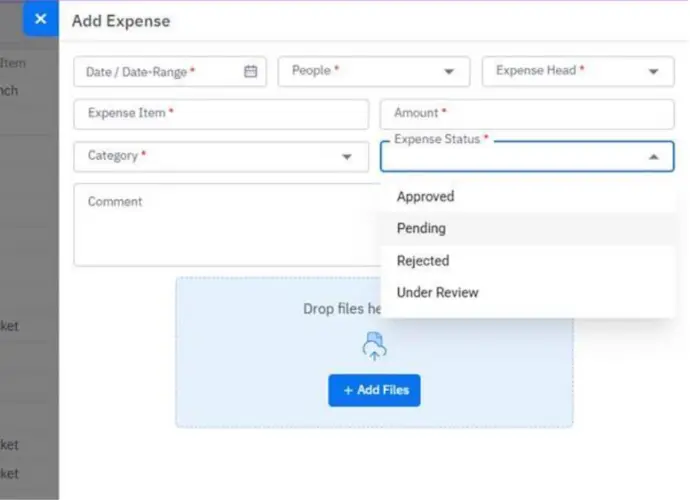
Easily monitor individual employee expenses by date, employee name, expense head, item, amount, category, and status. View approvals or rejections to speed up reimbursements and keep expense management hassle-free.
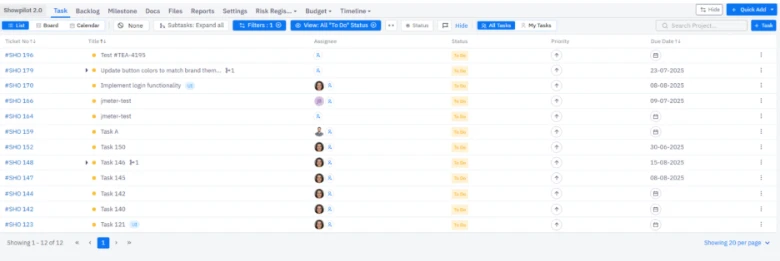
Managing your projects just got easier! You can now add tickets directly from Project Epics and Milestones — whether new, existing, sprint items, or tagged tickets.
This update streamlines your workflow by letting you:
Click on any one from the list. A side panel opens on the right. Click on “Add Item”.
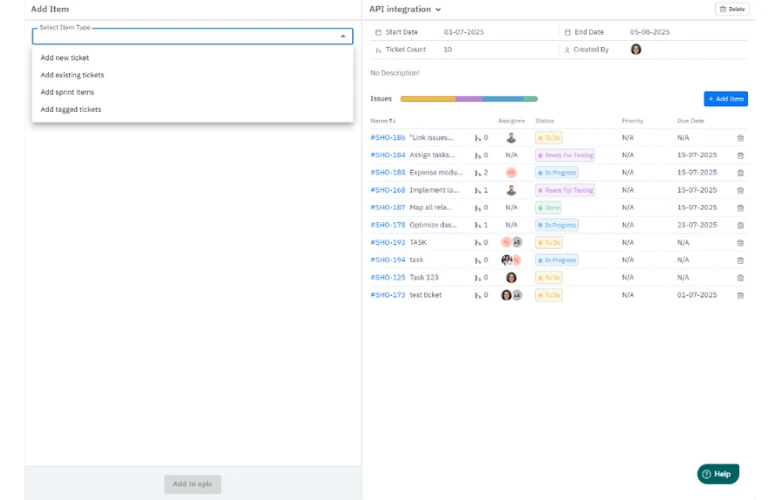
You can add items to the epic by selecting any one of the options from the list.
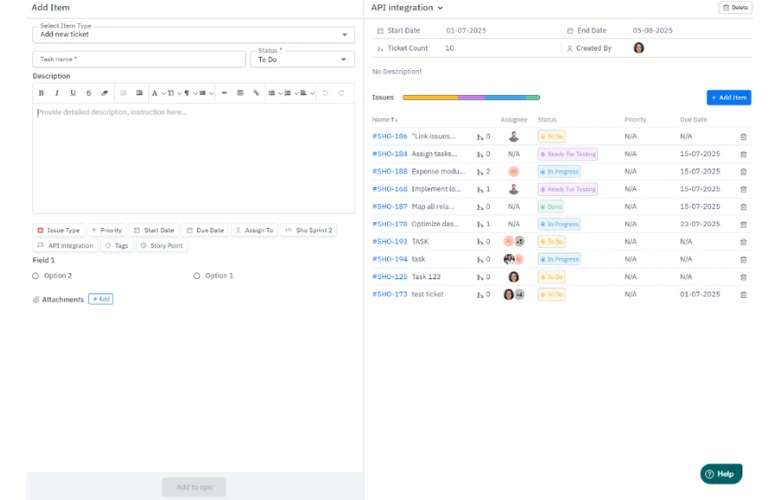
It’s all about adding a new ticket, the process and methodology of which is akin to the established process of adding a new ticket in TeamTrace.
You can choose any one of the existing tickets within the sprint to the epic or bulk upload all tickets to the epic.
Note that you won’t be able to add any ticket, whose due date (in this case, 24-06-2025), exceeds the end date of the epic (which is 05-08-2025 in this case). The following error message will pop up in such a case.
You can select sprint items to the epic from the list.
Choosing “Add Tagged Tickets”:
You can add only those tickets that are tagged to the epic.
The options of adding tickets will be the same as discussed above. You just need to select from the following options:
Note: This method of adding tickets to the epic is for scrum. In case of kanban, the option of “Add sprint tickets” is not available.
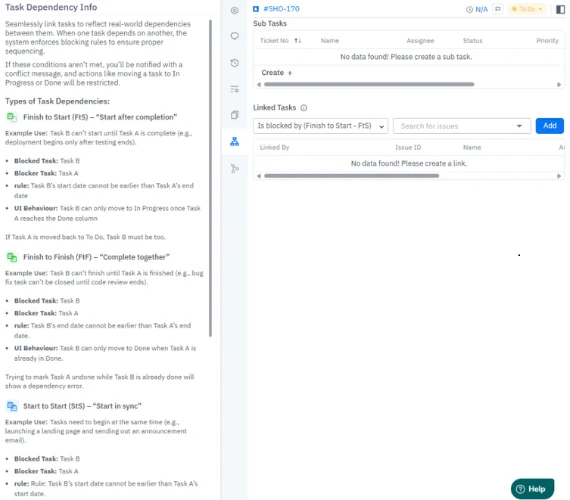
Tackling complex projects just got simpler! Now, when you select any task under Projects, you can click the ‘i’ icon next to Linked Tasks to instantly view Task Dependency Info.
This feature helps you:
With Task Dependency Info, you can make faster decisions and keep your project timelines error-free.
We’ve made navigating your projects and tasks a whole lot easier! With our new List/Board Filter Saved Views for projects and tasks, you can now save custom filters and return to them anytime, without the hassle of resetting filters every time you log in.
Here’s how it works:
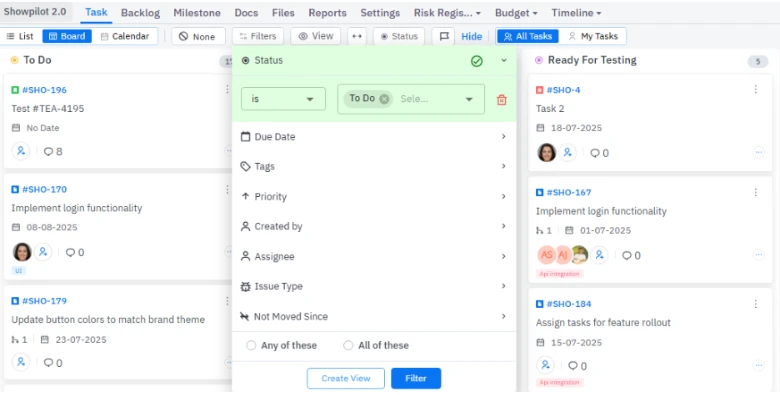
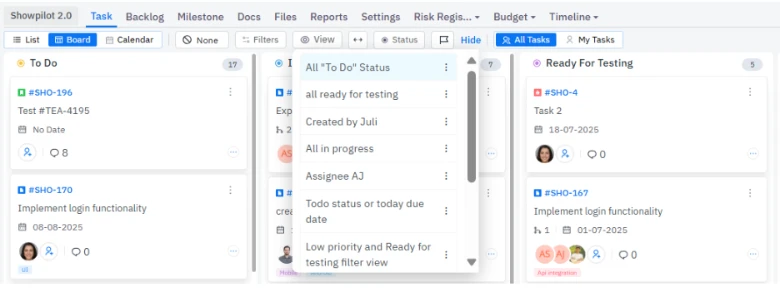
Here’s how it works for ‘Tasks’:
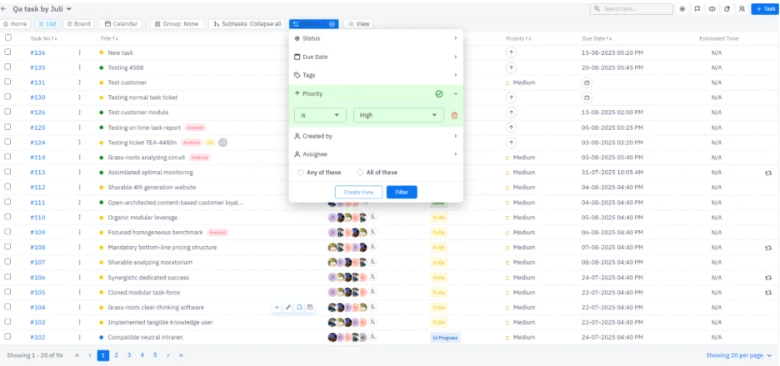
First, create a view. For instance, selecting High priority as the filter and creating a view against this very filter here.
Now, enter the view name to add the view.
All those tasks with high priority will then appear on your screen.

Why this matters:

For example:
This feature saves time, reduces clicks, and ensures you always have the exact perspective you need — whether you’re tracking deadlines, priorities, or team progress.
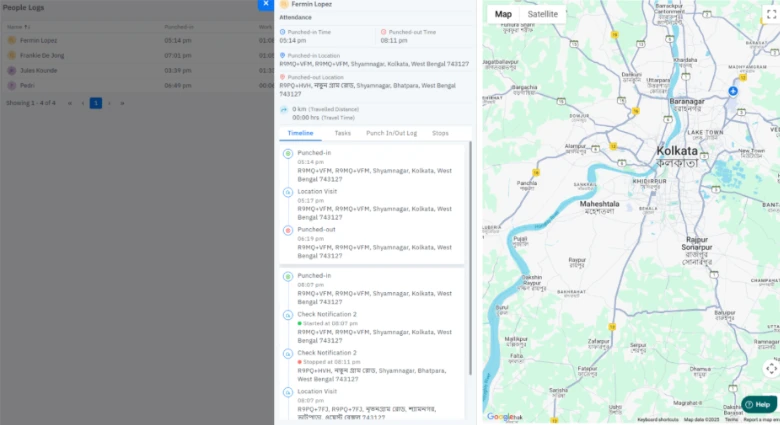
Easily track and manage your field workforce with the new enhanced People Logs under Field Ops.
Select ‘Field Ops’ > People Logs to see what’s new:
Timeline Tab
Get a complete timeline of a field employee’s day. View punch-in details, live location coordinates, and tasks completed — along with precise start/stop times and locations.
Tasks Tab
See exactly how much time an employee has spent on each task. This gives you clearer visibility into productivity and accountability.
Punch In/Out Log
Access detailed punch-in and punch-out records, including total logged duration and location coordinates for complete transparency.
With these updates, monitoring field activities is now smarter, clearer, and more reliable.
With these July updates, we’re shaping a smarter way to track work, manage teams, and drive accountability. Every release is a step toward giving you the tools to scale with confidence, whether your team is in the office, on the field, or spread across time zones.
Now it’s your turn! Explore these features inside TeamTrace, put them to work, and experience how small tweaks can create big wins in productivity and transparency.