 TeamTrace


This document provides an overview of the latest enhancements introduced in TeamTrace. It covers the newly launched Budget Management module, monthly leave entitlement configuration, and the Consolidated Timesheet, along with step-by-step instructions to help administrators and managers configure and use these features effectively.
TeamTrace now supports project budgeting. Within any project/project types (Kanban or Scrum), administrators and managers can configure budgets, track expenditure, and monitor financial performance against set targets.
Note: A budget cannot be started before its set Start Date.
Navigation: Project → Select Any Project → Budget → Budget List
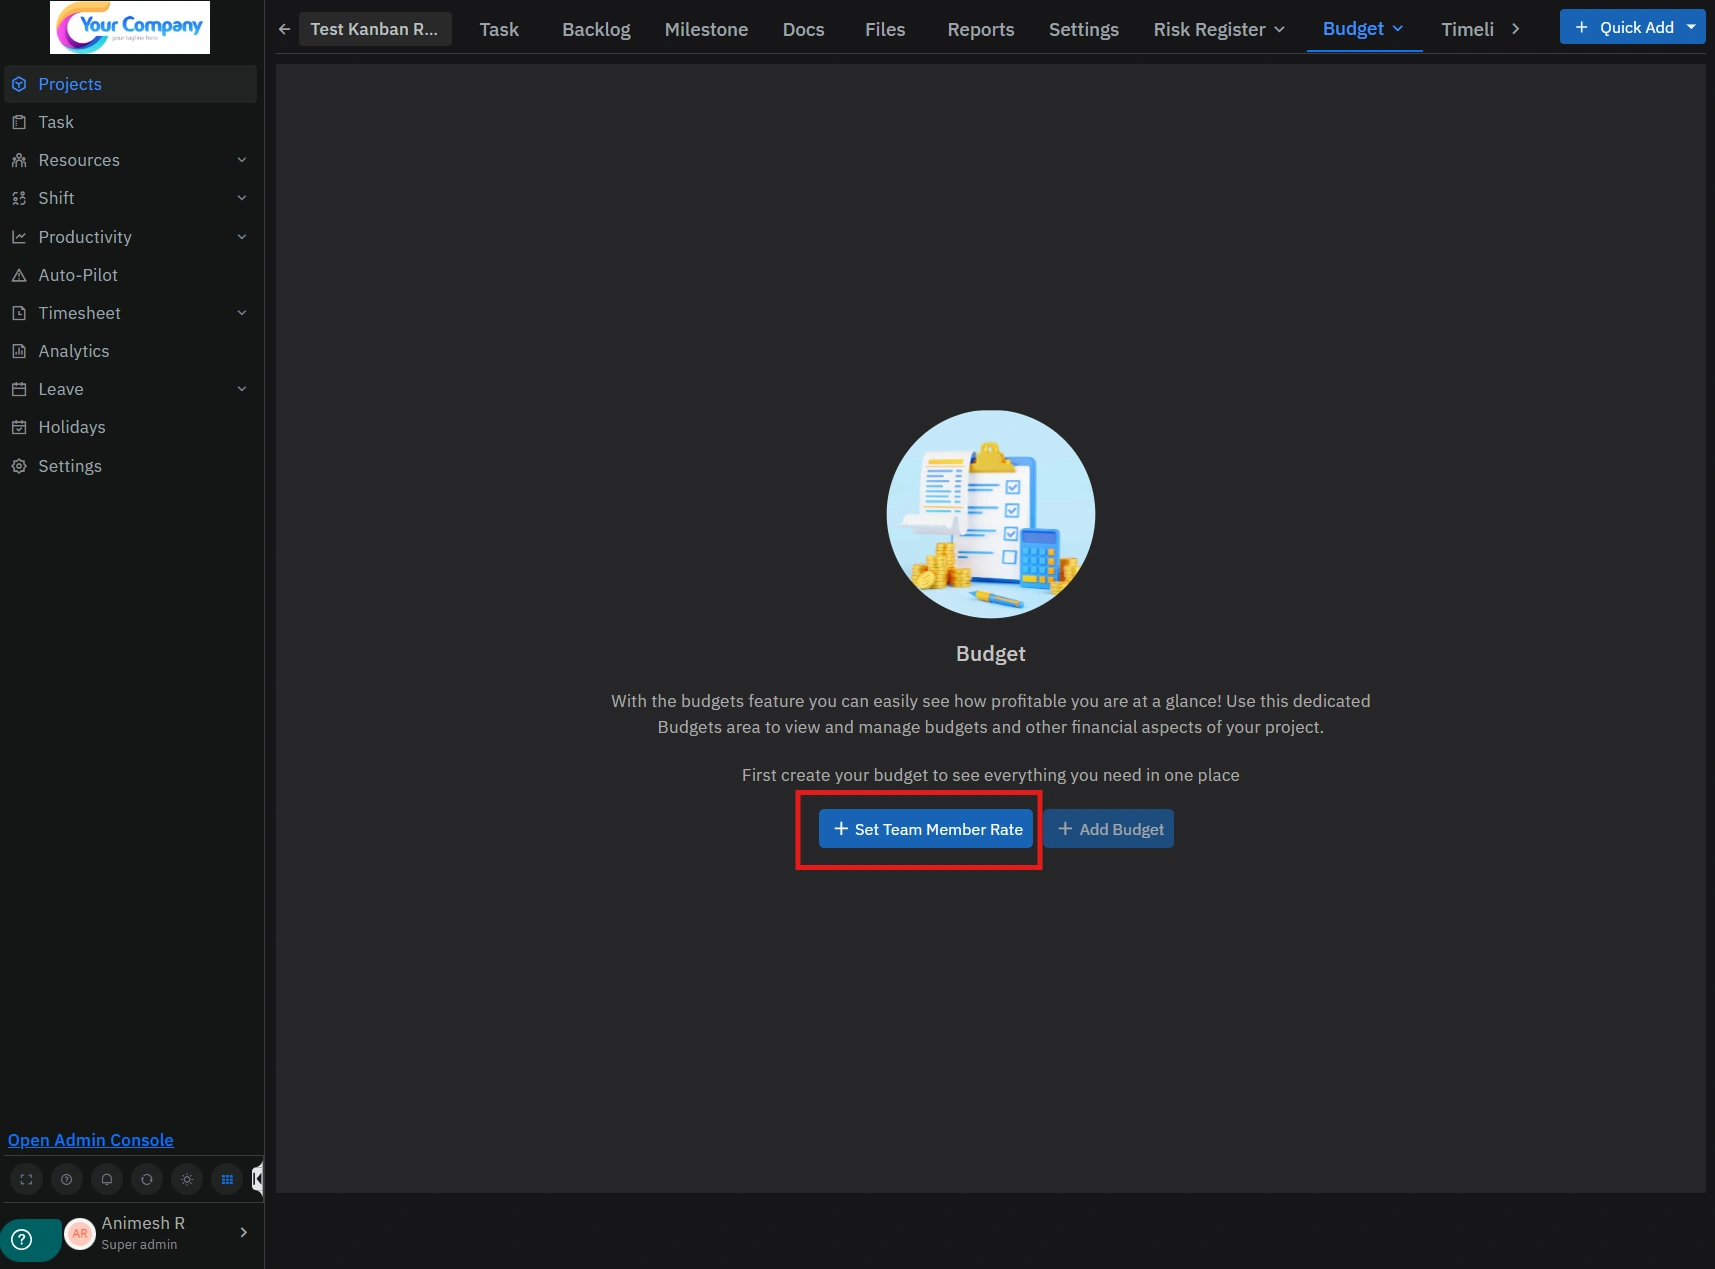
Step 1: Set Team Member Rates
Before adding a budget, you must configure the billable rate/hr for at least one person.
Click + Set Team Member Rate and enter the following for each team member:
Note: The project currency selected during project creation will be displayed here.
Note: The People Cost Rate/Hour defined during project creation is used as the default Cost Rate/Hour for that user in all budgets under the project.
Note: While creating a budget, you can set the Cost Rate/Hour for each team member. Any updates made to these rates will automatically be reflected when editing the user’s Cost Rate/Hour from the Project Creation screen.
Step 2: Add a Budget
Once team member rates are configured, click + Add Budget to proceed.
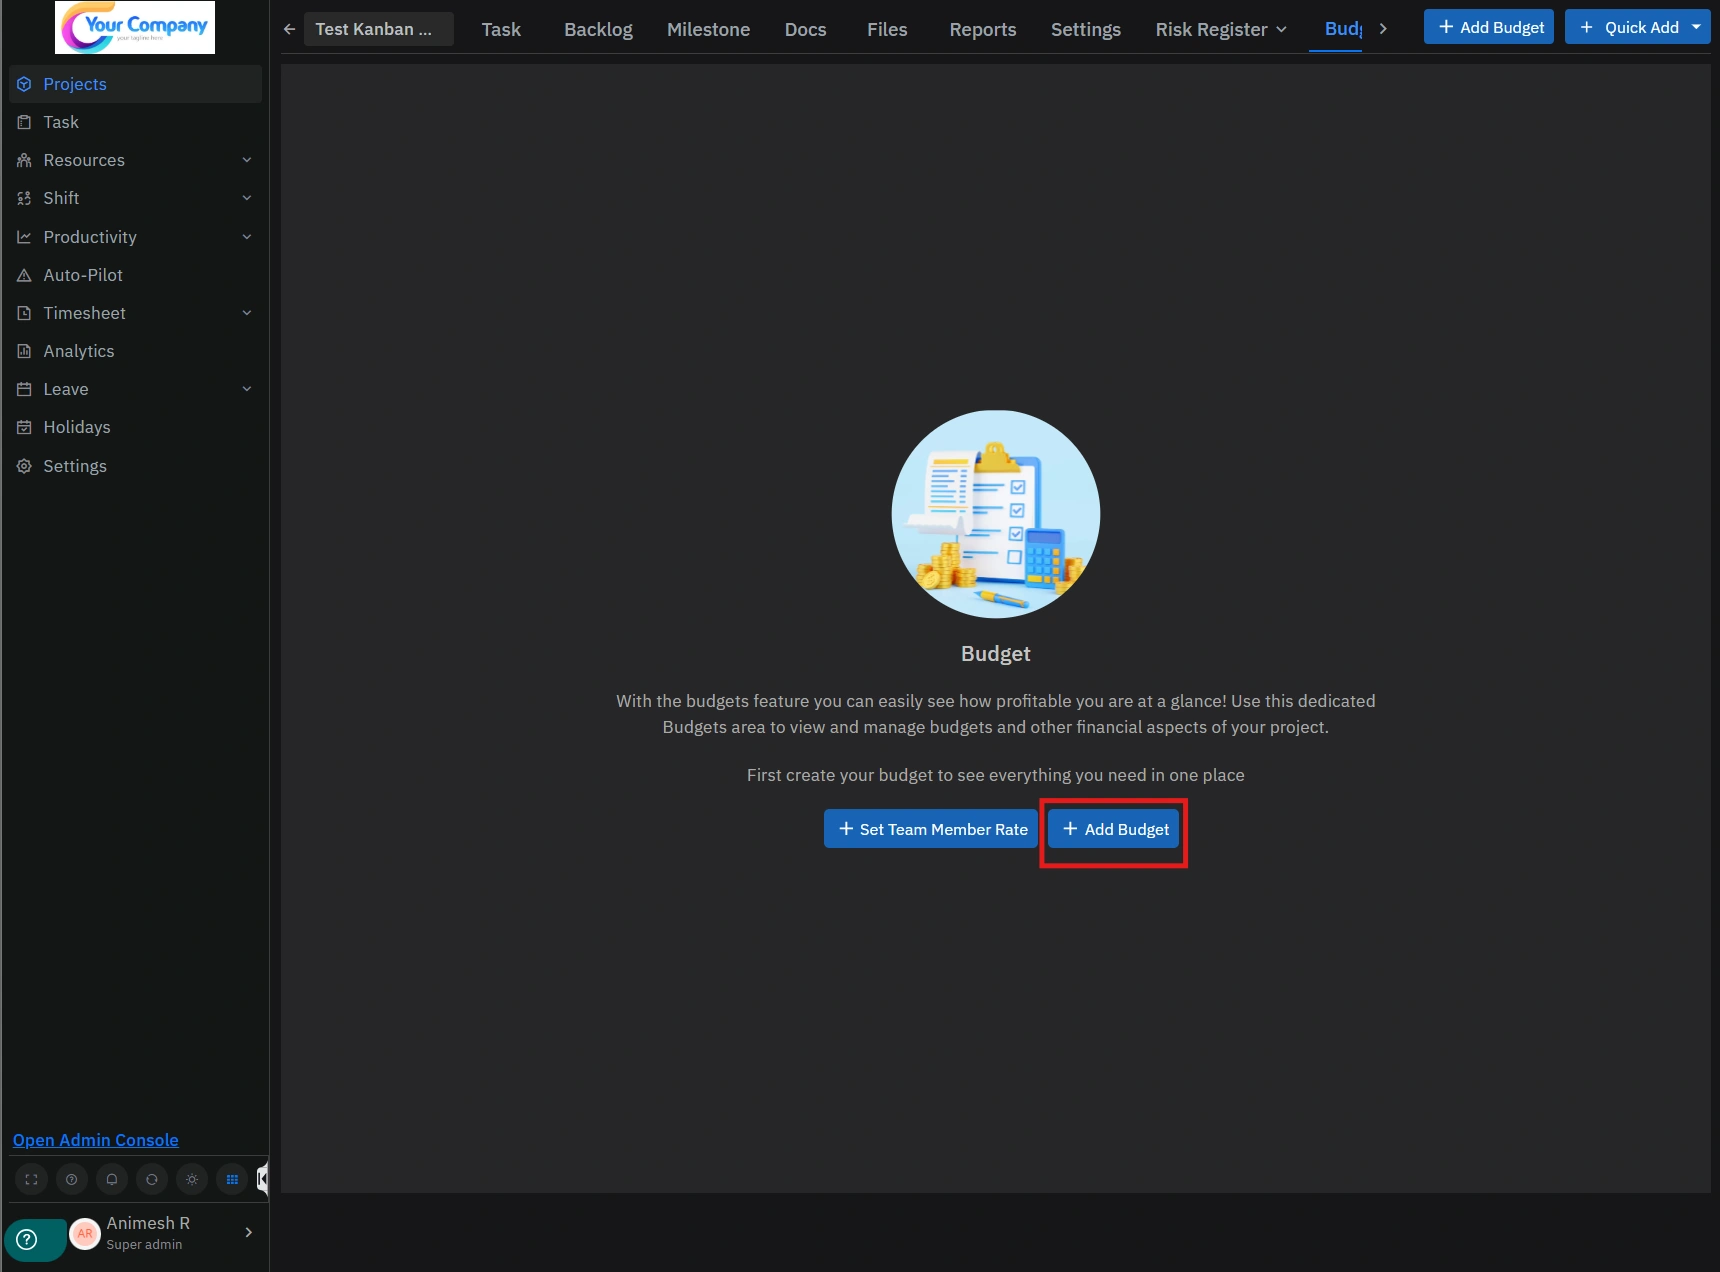
Under Budget Type, select Fixed Fee.
Fill in the following fields:
Step 3: Set Financial Targets (Optional)
You can define profitability targets for the project by enabling the Set Financial Targets option.
Enter the desired Profit Margin. The Target Profit and Target Cost will be calculated automatically.
Once all required fields are completed, click Create Budget to save the budget to your project.
Step 4: Start the Budget
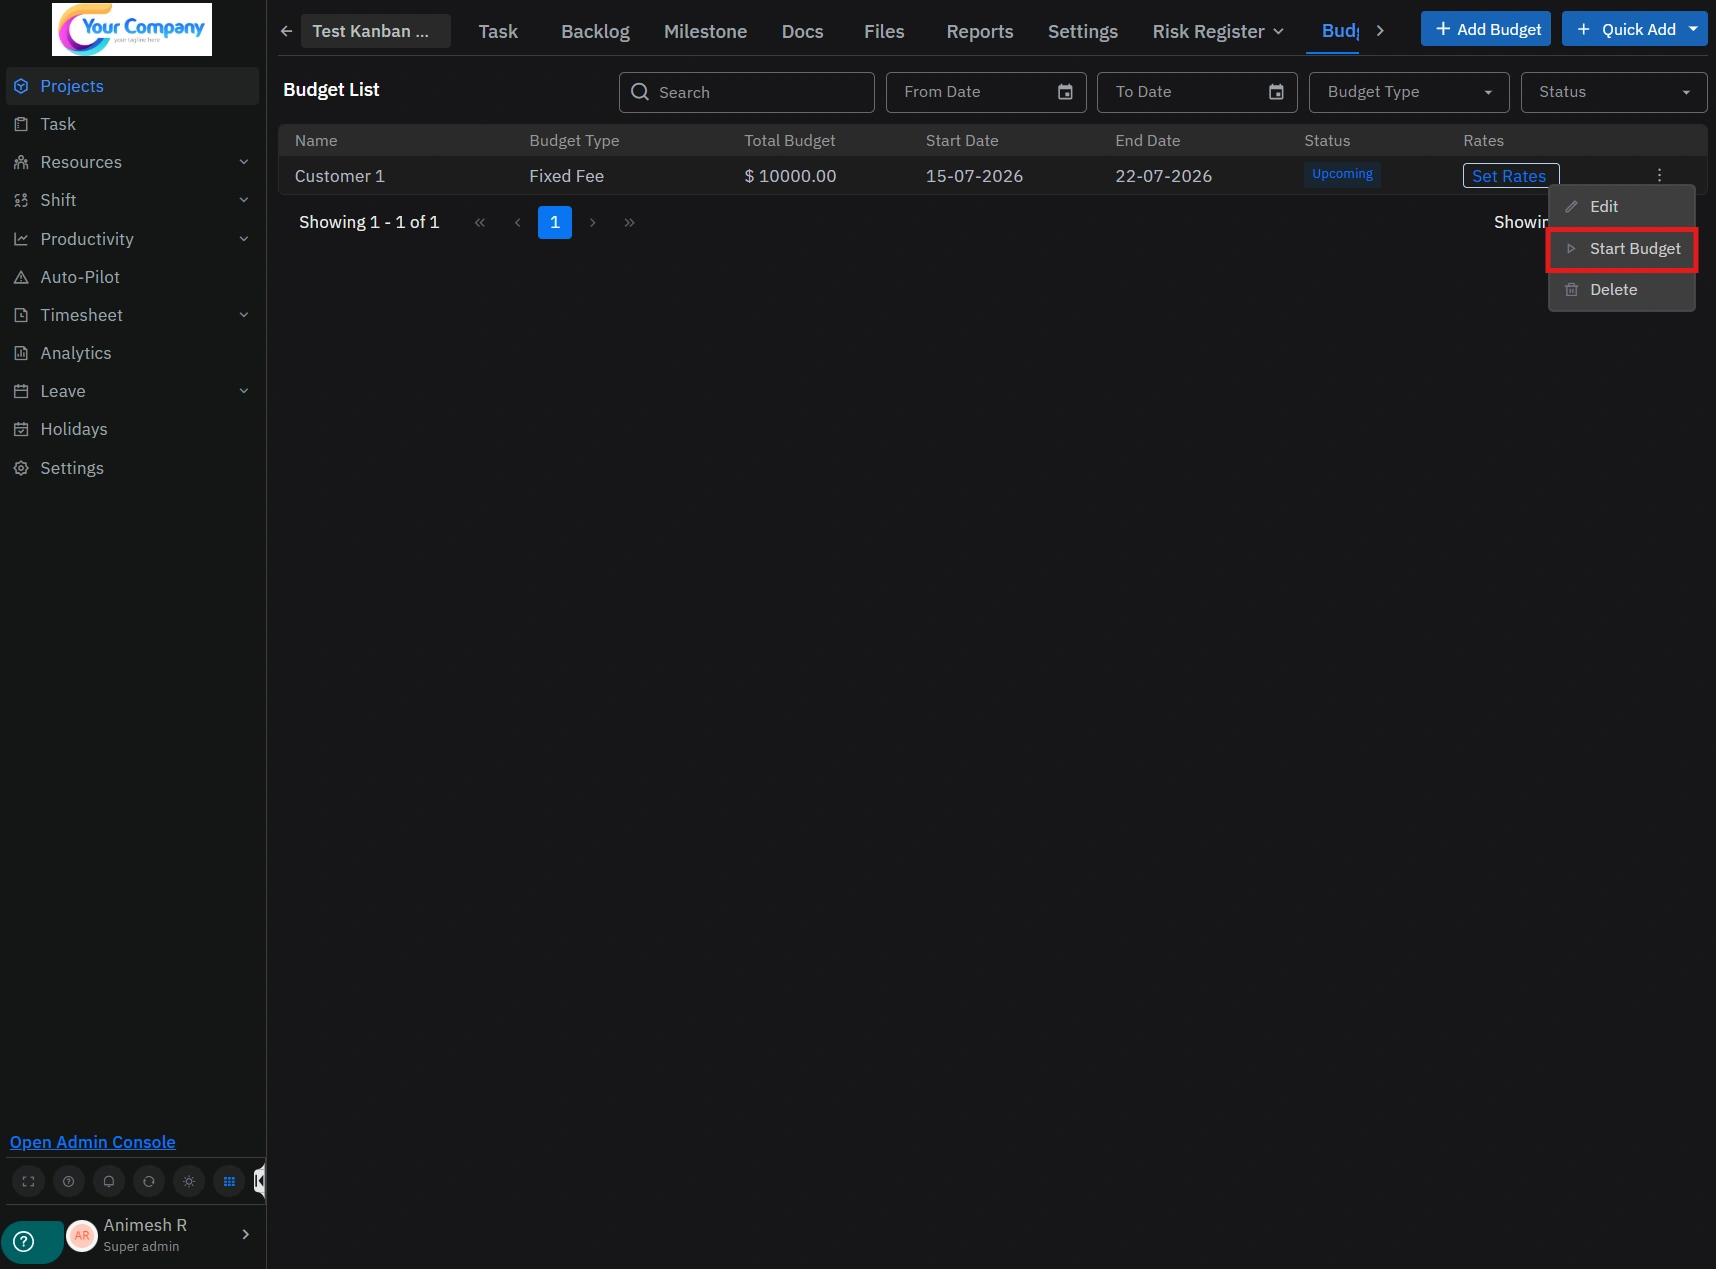
After the budget is created, it will appear in the Budget List. To activate it:
Click the three-dot menu on the right side of the budget entry and select Start Budget.
You may also review or update team member rates at this stage. Rates entered in INR will be dynamically converted to the project’s budget currency (e.g., USD) based on the prevailing INR-to-USD exchange rate at the time.
Step 5: View the Budget Dashboard
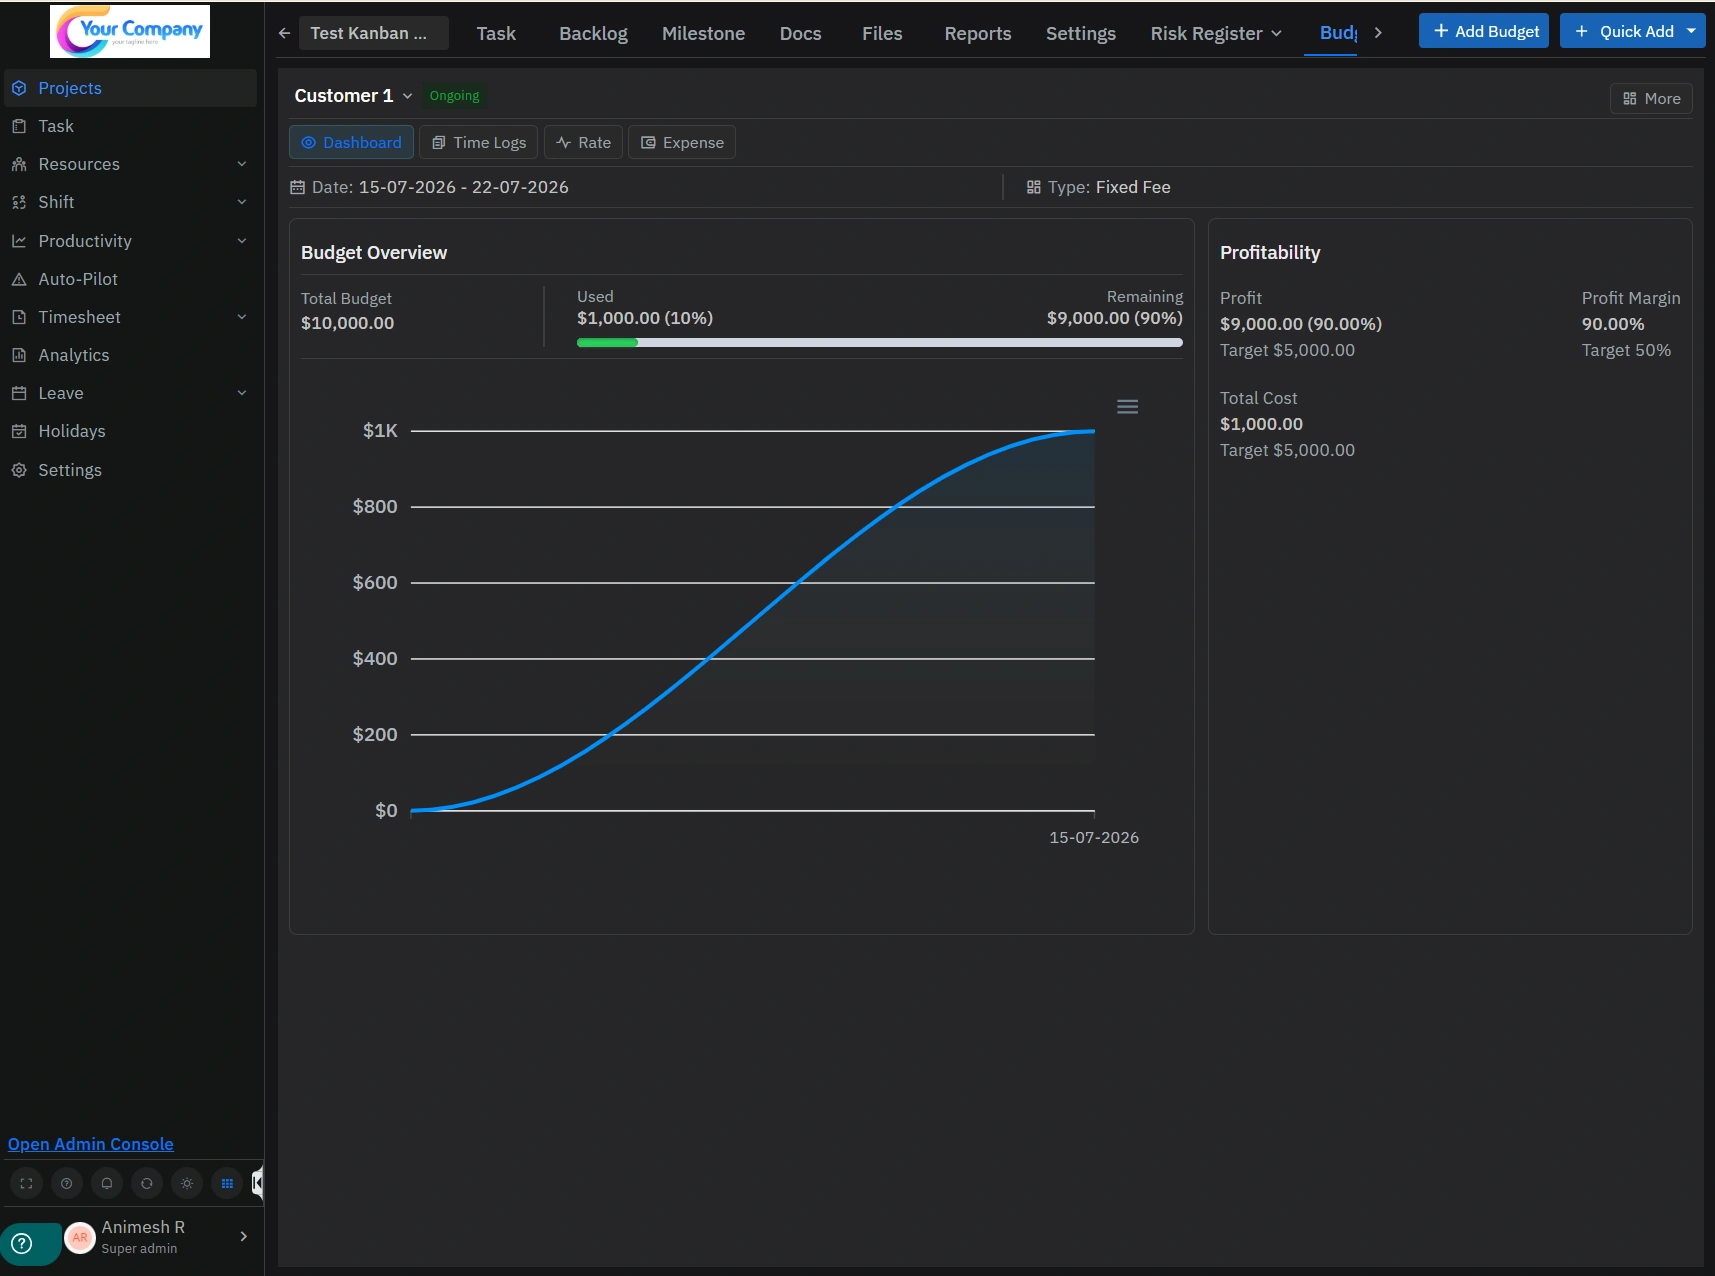
Click on the budget entry to open its dashboard. The dashboard displays the following:
Click + Add Expense and fill in the following fields:
One-Time Expense: A single deduction is made from the total budget. .
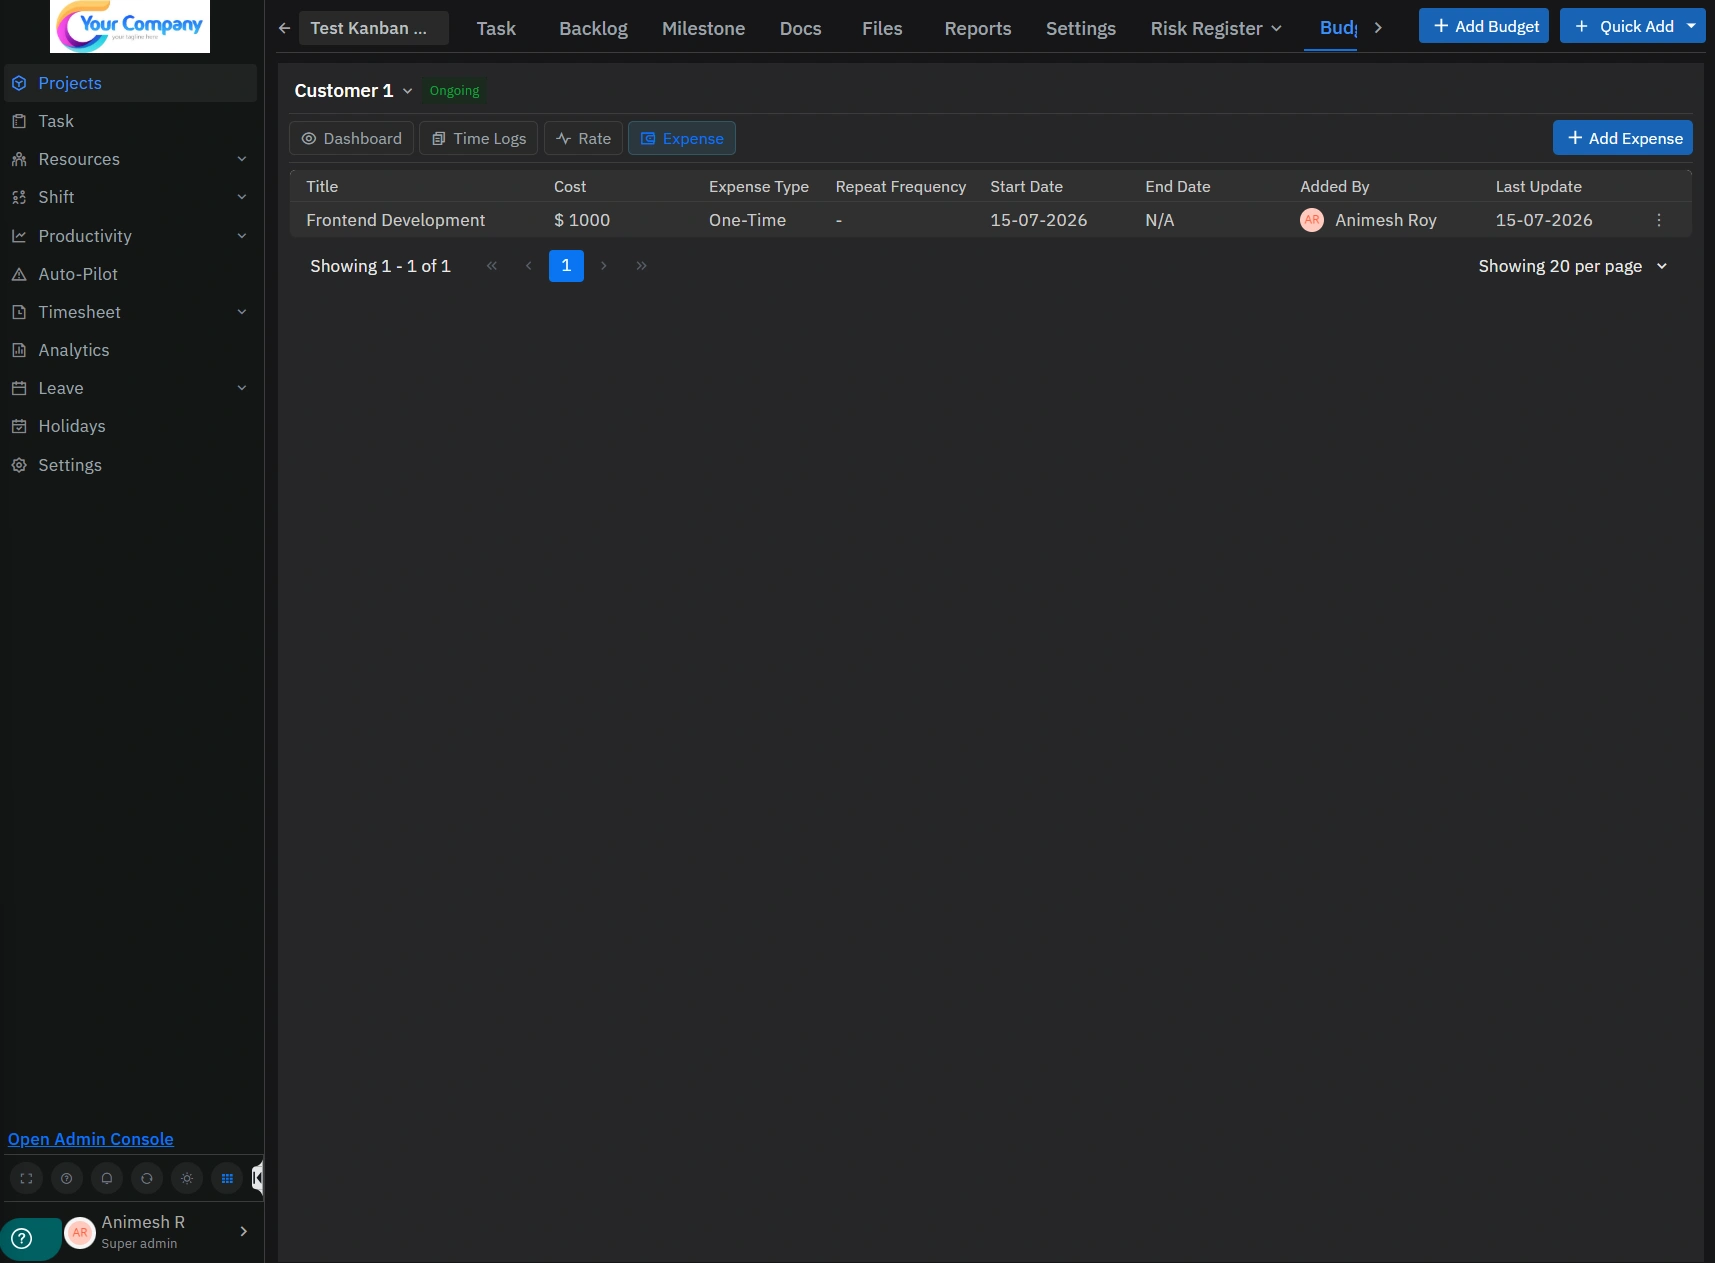
Recurring Expense: You will be prompted to set the recurrence frequency — Weekly, Monthly, Yearly, or a Custom Date. You must also specify a Start Date and End Date for the recurring cycle.
Once added, the expense entry will appear in both the Expense tab and the Budget Dashboard.
Note: Only admins, managers, or users with the appropriate permissions can view budget data. Two budgets cannot have overlapping date ranges. Each budget must have a distinct Start Date and End Date.
The team member rate configuration for Time & Material budgets follows the same process described in the Fixed Fee section above.
Note: A budget cannot be started before its set Start Date.
Navigation: Project → Select Any Project → Budget → + Add Budget
Step 1: Add a Budget
Click + Add Budget and select Time & Materials as the Budget Type.
Fill in the following fields:
You may also set a Default Billable Rate that will apply across this budget.
Click Create Budget. You will have the option to set or review team member rates after creation.
Scenario 1: All Times Are Auto Approved
All time logs are automatically approved when a user records their time.
The default billable rate set for the budget will be reflected in the dashboard.
Time logs will be marked as auto billable, and no manual approval action is required.
Scenario 2: Billable Times Are Manually Approved
Admins or managers must manually approve time logs submitted by users.
Approval can only be performed after the close of the working day — not before.
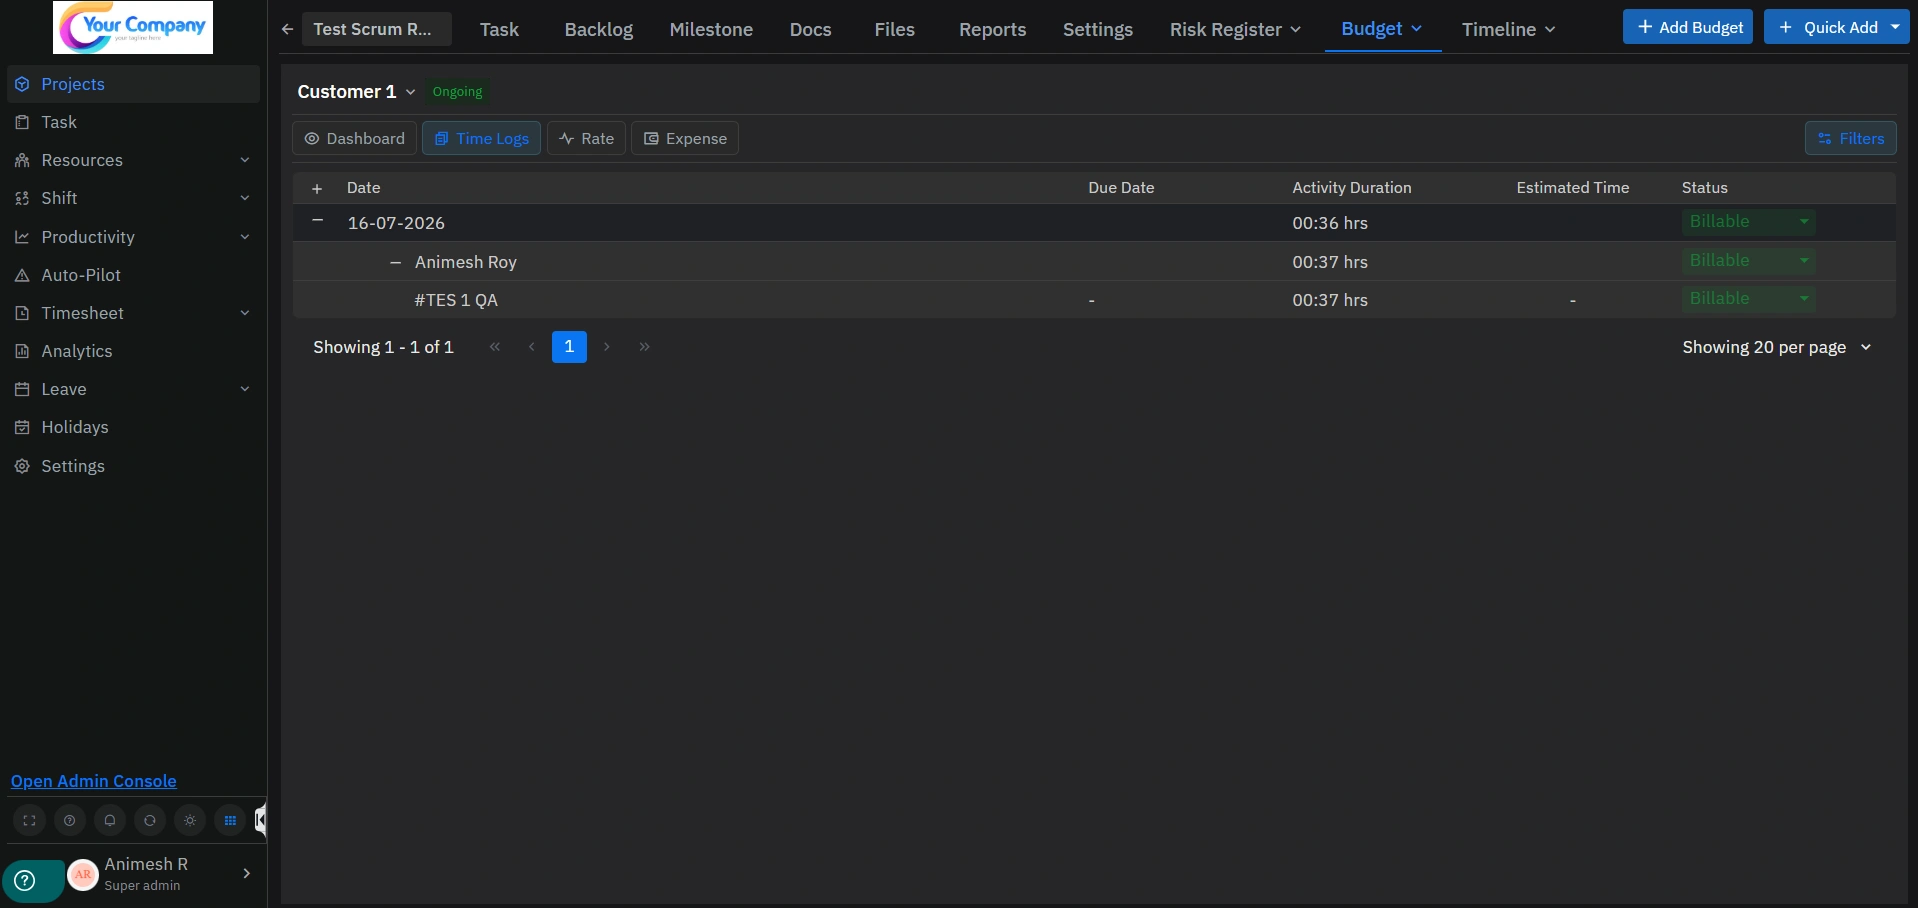
In the Time Logs tab, entries will display a Pending status until the day ends, and approval is actioned.
The Dashboard, Rate, and Expense tabs function identically to those described in the Fixed Fee Budget section above.
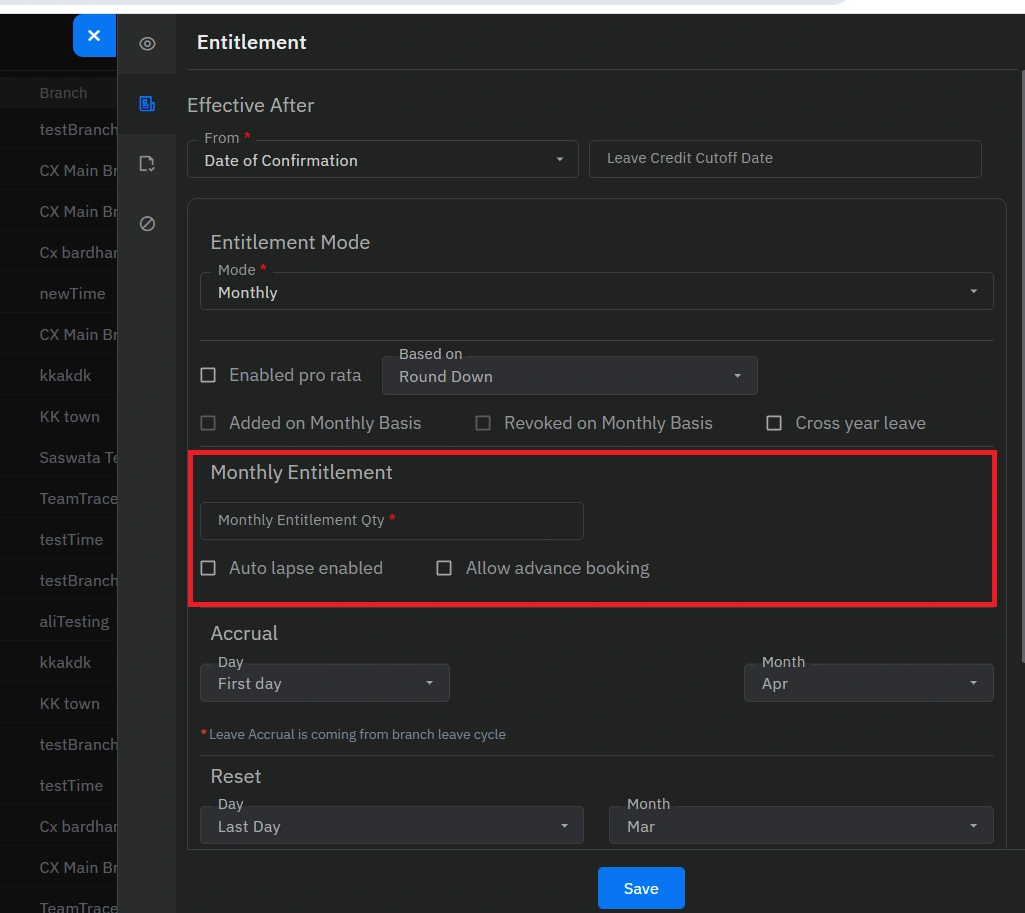
TeamTrace now allows organizations to entitle leaves on a monthly basis. This feature is available under the Entitlement tab after creating a leave type.
This section determines how a leave is entitled to an employee. Previously, leaves were applicable via Yearly option only. Now it can be set to Monthly, which means entitlement is granted on a per-month cadence (and activates the Monthly Entitlement section below).
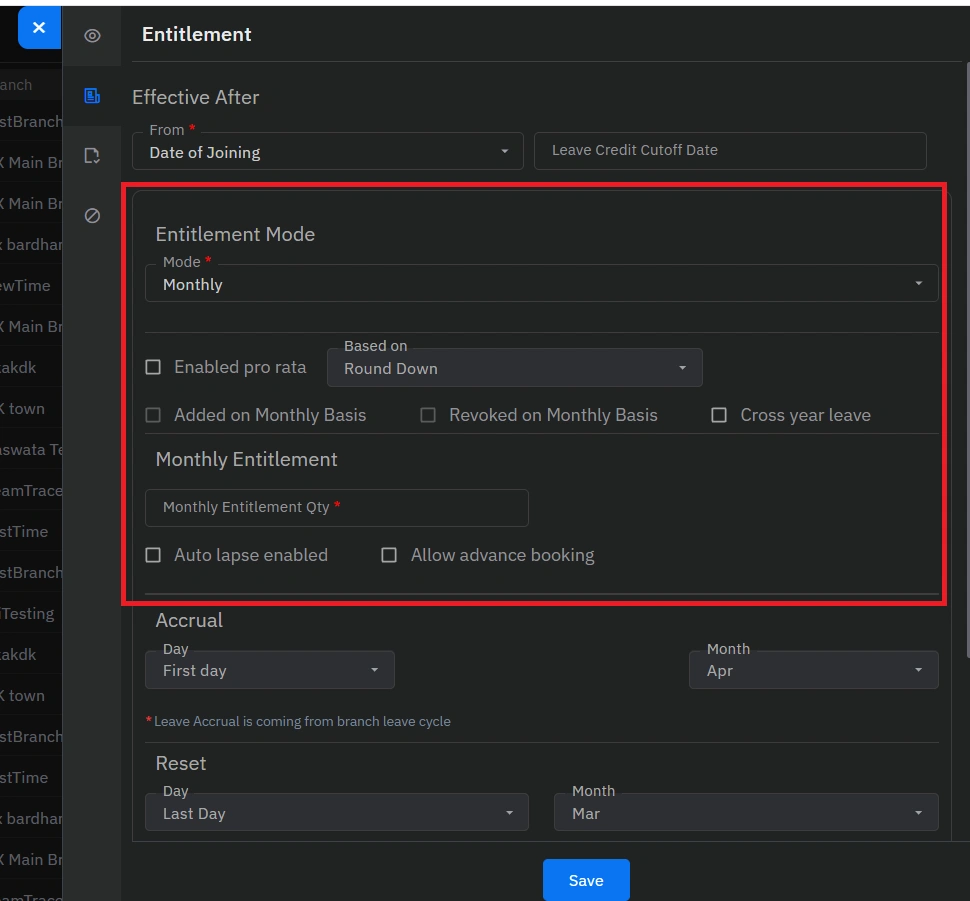
Pro rata & accrual controls
A consolidated timesheet covering both TeamTrace and FieldTrace is now available for admins and managers, showing active hours alongside punch-in and punch-out times.
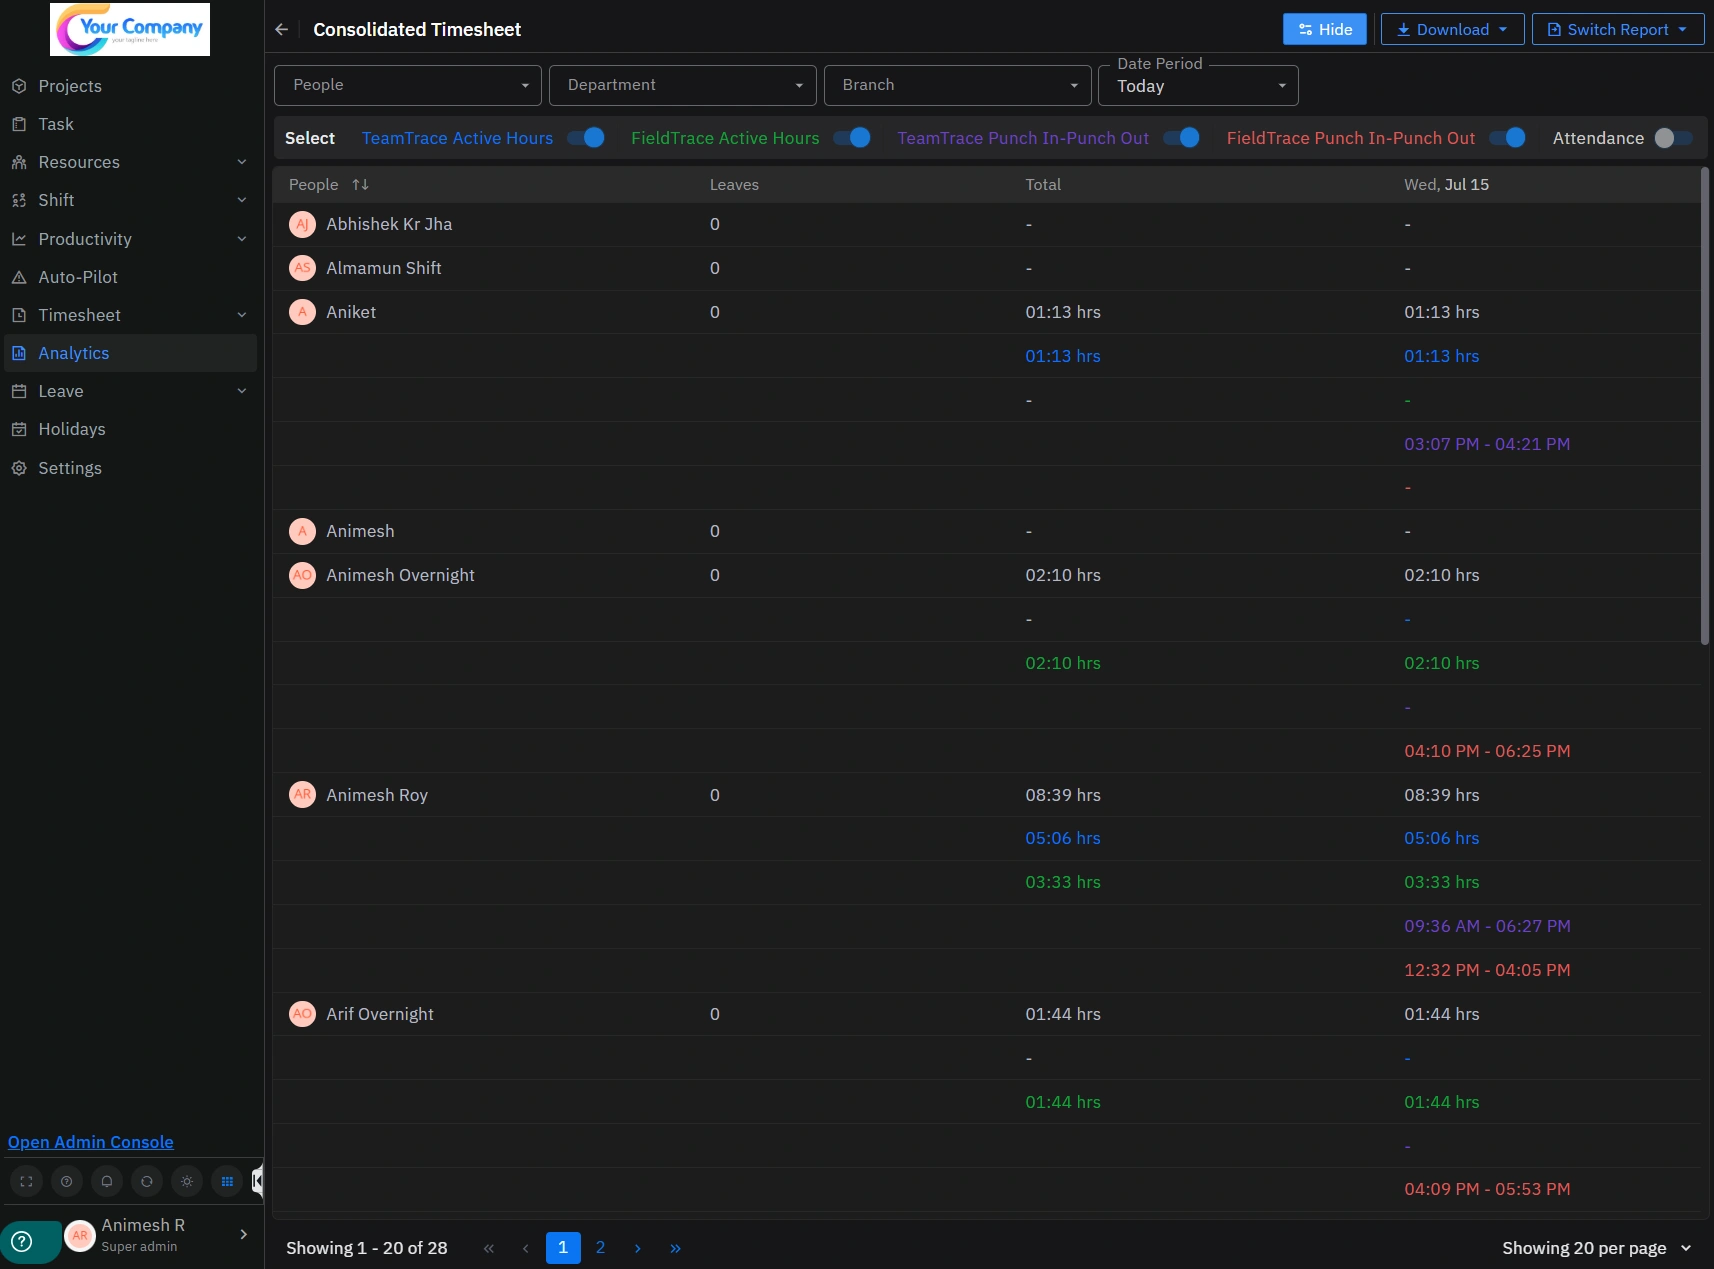
Navigate to Analytics > Others > Consolidated Timesheet.